Module 6:
During downloading the module 6, I noticed, that the topic of this module is sea and sky. By fortune I have booked a one day journey to Venice in a few days. The content of this study trip was: "The fabrics as dreams are made on". We visited the very famous and old manufactories : Bevilaqua and Rubelli. These two are famous for their special kind of silk velvet ( soprarizzo velvet). So I took many fotos from water during the journey.
Picture 1,2 and 3 show water surfaces with reflections, ripples, froth and bubbles.
Picture 4: pollution and reflections
Picture 5: waterreflections. The pictures above are taken in Venice.
Picture 6,7 and 8 are pictures our famous "Weissensee". There are interesting colors, textures, reflections and movements.
Picture 9: weaving reeds by Bevilaqua
Picture 10: silk threads
Picture 11: a piece made in soprarizzo technic by Bevilaqua
Picture 12: pillows by Rubelli in soprarizzo
Picture 13: a fotosampler from water and reflections
Chapter 1
Drawing methods:
Picture 14:
1-14 (numbers on the foto):
1: Prisma Color- broad and thin, 2: Stabilo, 3: Prisma Color-broad and thin, 4: Neo Color II, 5: Pastell Jaxell, 6: Derwent inkdense, 7: oil patells, 8: Derwent, 9: Edding 500, 10: gelly pen, 11: Prisma Color, 12: Neo Color, 13: pencil, 14: gel pen
Picture 15:
1-5 (numbers on the foto)
1: different pencils of Neo Color 2: with Prisma-broad, 2: melted wax- procion, correcture pen and permanent pencil, 3: procion- Prisma broad, gelly pen,- felt pen, 4: stemped with Distress ink, Prisma Color- broad and correcture pen, 5: water soluble oil pastel with a little bit water, Prisma Color- correcture pen.
Picture 16: sgrafitto
First row from left to right:
First layer: oil pastels, green and the second layer oil pen stick and than scratched.
Drops of candle wax and than a thick layer of Neo Color and scratched in this piece.
The first layer in oil pastel gray the next layer is blue oil pastel and scretched away the gray can not be seen.
Two layers of hot wax the third layer was done with Neo Color than scratched.
Two layers of Neo Color by changing the layers.
Second row from left to right.
Hot wax two layers of oil pastels.
The first layer green oil pastel the second was wax Crayon and than scratched.
Oil paint stick iridescant light blue second layer oil paint stick charcoal blue scratched in feather.
Thin layer oil paint stick and two layers thick oil pastels, scathed in swirl.
Light blue wax Crayon and a dark blue layer scratched in wavy lines
The results are very different. To scrap away you need a heavy layer of crayon, but the color layers are not always to see.
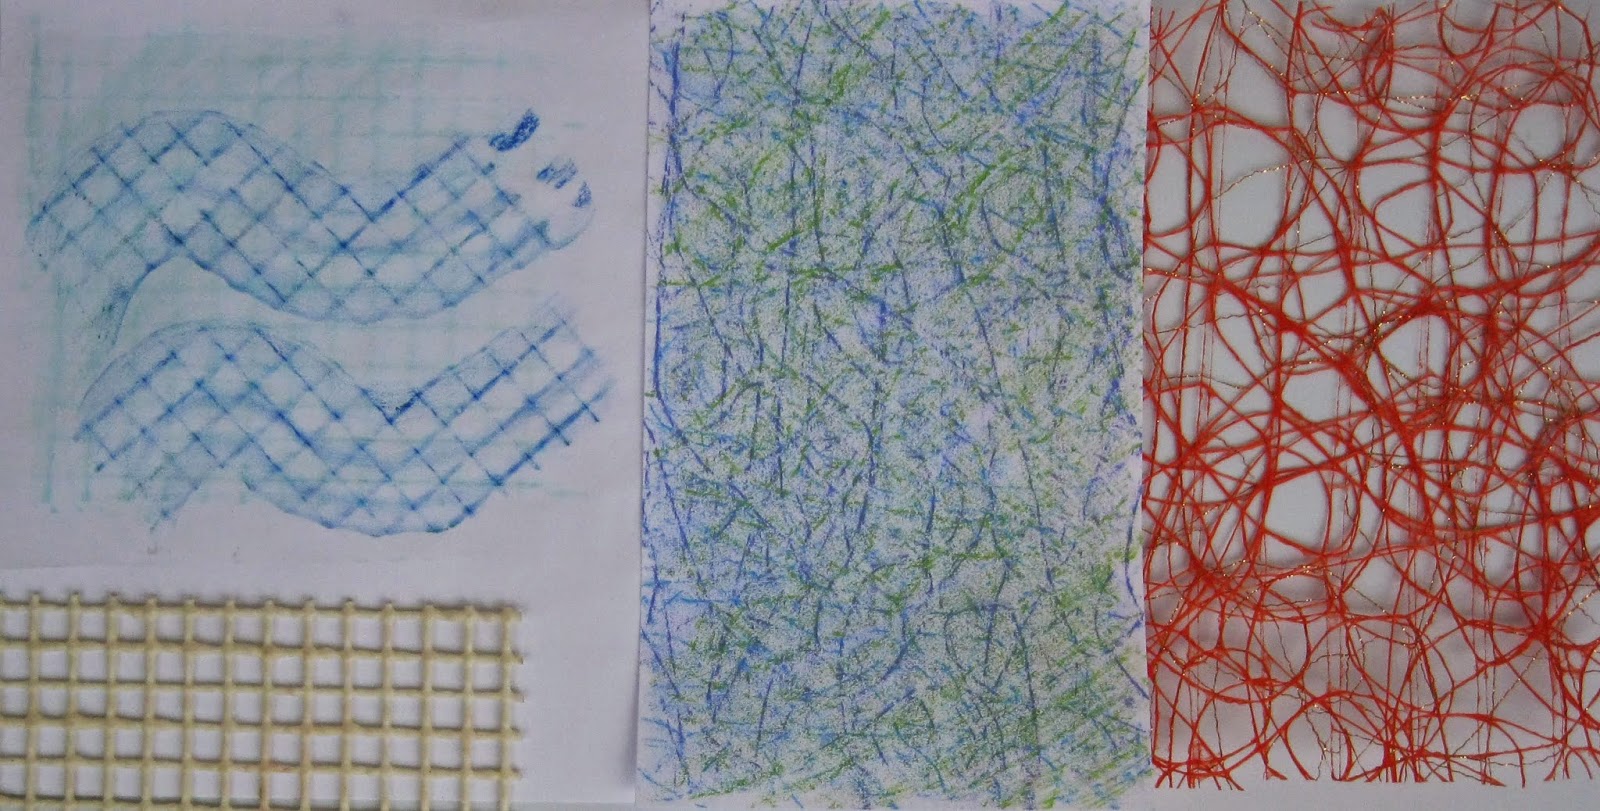
Drawing with frottage:
Picture 17:
Left side: frottage on a rubber mat with light blue crayons, straight lines, than wavy lines across the first layer with dark blue made on the side of the crayon.
The next one is made on mesh wire in scribble with Neo Color light blue, sky blue and yellow green.
Picture 18:
Frottage with oil paint sticks in blue.
Frottage with different colors of oil paint sticks in different directions by turning the rubber plate.
Frottage in two diagonal directions with Neo Color.
Picture 19:
Wooden block with paper fastener for rubbing in short lines, long lines and spiralling in blue.
Wire mesh as rubbing by turning in all directions with wax crayons.
Resist methods with crayons, ink, discharge and bleach:
Picture 20:
Straight lines made by drawing with wax crayons with different colors to make a resist and than a wash with deluded ink.
Oil paint sticks and also a wash with ink.
Picture 21:
Resist with oil pastels and a wash with water color light blue.
Resist with wax crayons a light wash with water color paints, this process was done two times.
Picture 22:
Resist with candle wax and a wash with water color paints (two times).
Resist with candle wax and a wash with water color paints.
In my opinion these two results are the best.
Picture 23:
From left to right:
Painted with ink and than sprayed with bleach.
First Dilusion Spray and than aply bleach with brush and Pipette.
First Procion and than track lines with my selfmade wooden stick.
Wavy lines again with a brush.
Picture 24:
In these two samples the Basic layer is done by ink and than stemped with bleach. One stamp is self made linol cut, the other is bought.
Transparent surfaces:
Picture 25:
Melted oil sticks on tracing paper, folded, after cool down the tracing paper was opened.
Two layers of plastic sheets with pieces of oil paint sticks and than ironed.
Plastic sheet painted with acrylic and than scratched into the paint.
Tracing paper applied with two colors of acrylic paint in two directions.
Picture 26:
Cellophane sheet covered with drops of melted wax and sprayed with black ink.
Cellophane ironed between two sheets parchment paper and than colored with different blue oil paint sticks.
The following sample is the same only made with one color.
Picture 27:
above:
A sheet of cellophane ironed on a big wooden stemp and than painted with oil paint sticks.
left under:
Bubble wrap was distorted for releasing the air, than painted with oil paint sticks, than covered with a sheet of transparent (bottom right) paper and than these two pieces were ironed.
Chapter 2:
Designing with shapes and layers
Picture 28:
A few samples more from decorated papers in my colorscheme of my fotographs. More methods blue watercolor paint covered with salt and household foil with sponge. Papers with bleach, rubbing, resist and acryl were done in chapter 1.
Picture 29:
The foto shows the reflections of pollutions in the water. I have made a simple drawing.
Picture 30:
I have cut two different papers ( left site) in wavy lines. Right you can see a piece of plastic. I made this by doing cut out pieces of plastic Shopping bags. These pieces were melted by ironing for glueing them together to demonstrate the water Pollution.
Picture 31:
This Piece of plastic is cut in wavy lines to glue them on paper to see in Picture 30.
Picture 32:
Papershapes identivy to my drawing and Pictures.
Picture 33.
To These two pictures my drawings for later on in this module.
Picture 34:
Another example of drawings of my fotographs.
Picture 35:
A simple drawing for the next paperdesign.
Picture 36:
The first cut shapes with my papers.
Picture 37:
The paper of picture 36 was cut up again and recomposed new.
Picture 38:
One more drawing.
Picture 39:
Drawing and paper example, done by this fancy scissor.
Chapter 3:
Free machine stitchery:
Picture 40:
This sample is made on my painted callico
From left to right and top down, all little squares are done by the same cotton sewing yarn, I performed different effects of rhythm such as flowing, crossing, calm and overlapping:
circles, waves, combining of waves, zig-zag and circles, layers of straight stitch, overlapping little circles, overlapping larger circles, meandering, not closed circles, half circles, overlapping only in the middle, loosely straight lines, loosely wavy lines.
The folling eight samples are done by zig-zag stitches: loosely wavy line, loosely straight lines, compact zig-zag rows, rows of big zig-zag overlapping, circle lines, cross over, curves, compact rows of zig-zag stitches and than a second layer of big zig-zags.
Picture 41:
A sample with whip stitch, loose bottom and tighter top tension.
The first eight samples are done by straight stitch.
The following eight patches are done by zig-zag stitch.
Picture 42:
Is a sample with different types of yarns with upside down. I have used cotton thread, silk, lana Madeira, Madeira decore and Sulky metallic.
Picture 43:
This is the backside from my sample above. I find both sides interesting.
Picture 44:
A sample with automatic pattern done by free machine stitching.


